How to Measure a Shirt
If you have a shirt that fits well and would like us to match it, follow the instructions below and include the measurements in Special Instructions during checkout. We can create a custom dress shirt to match the measurements you provide. If you have any questions along the way, send us an email at [email protected].
- Without practice, most customers have the tendency to under-measure, so round-up or pull the fabric tighter than you think you should when taking measurements.
- For most customers, taking our sizing survey and using our suggested sizing will provide the best result. We only recommend measuring a shirt if you are certain of exact dimensions that you'd like to include on your shirts.
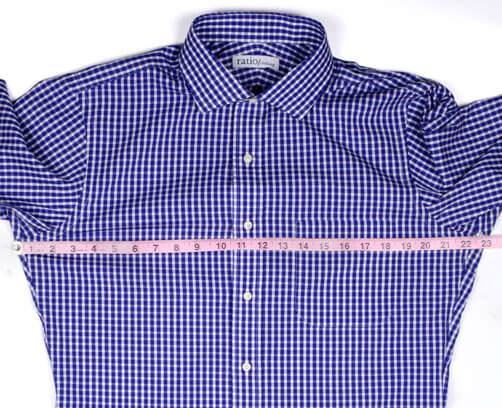
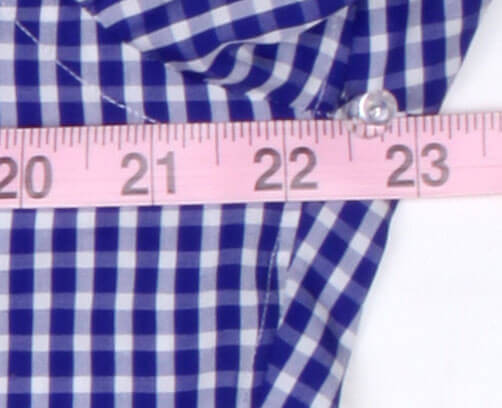
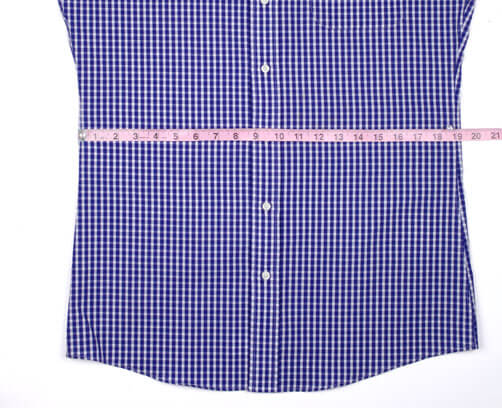
1. Chest
Button up the shirt and lay it flat on the ground (preferably a hard surface) and smooth the fabric out so that there are no wrinkles underneath or on top. Pull the fabric tight, but don’t stretch it. Place the measuring tape at the top of the seam where the sleeve attaches to the body of the shirt and measure across to the same point on the other side of the shirt. Don’t worry if you measure beyond the side seam on the shirt, just measure the shirt flat across. The correct measurement in the example photos is 23".
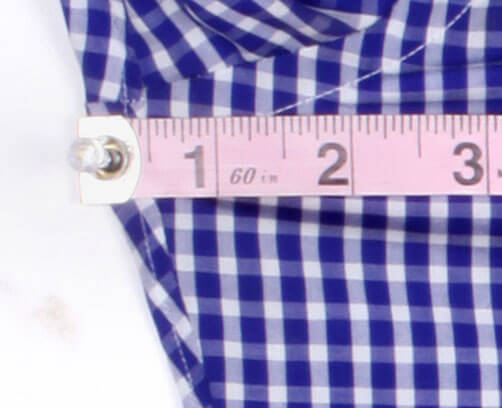
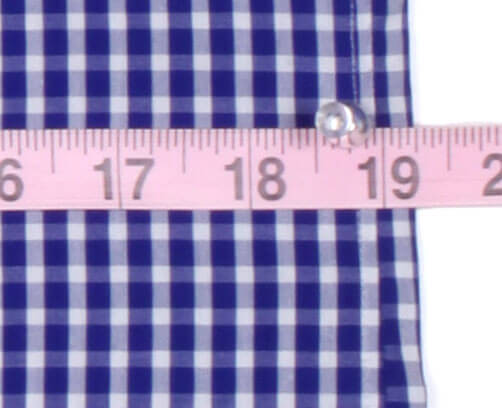
2. Waist
Lay the shirt flat on a hard surface (same as above). Find the narrowest part of the shirt, which should be about halfway between the armpit and the bottom of the shirt (or around the 5th or 6th buttons). Measure straight across from the left of the shirt to the right of the shirt. The correct measurement in the example photos is 19.25".
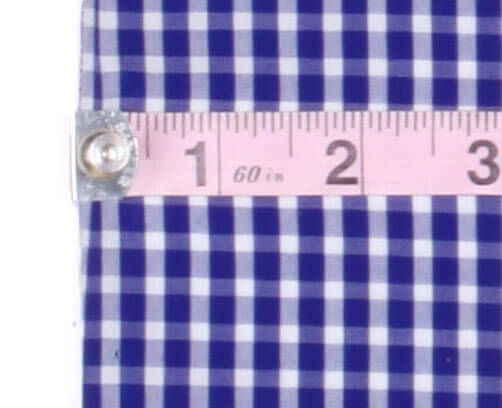
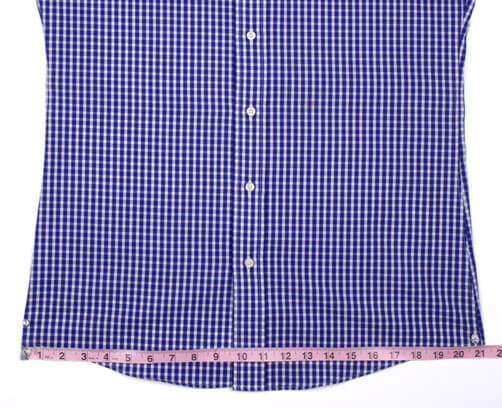
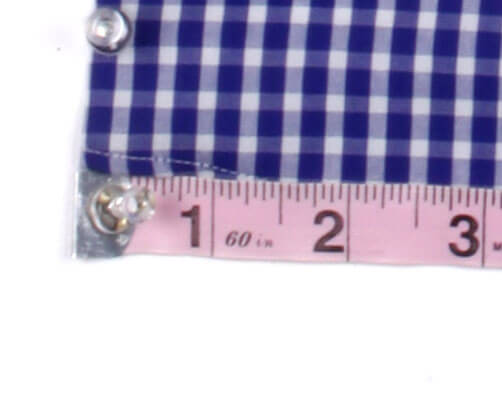
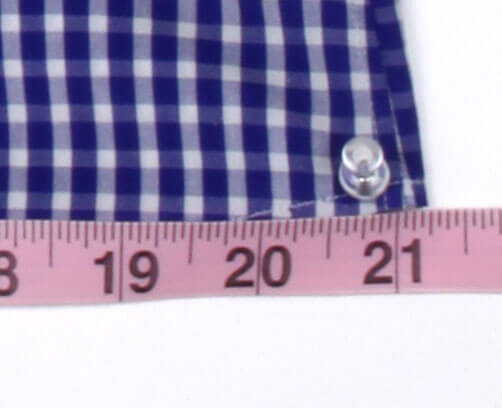
3. Seat
Lay the shirt flat on a hard surface (same as above). Place the measuring tape on the left bottom hem and measure straight across to the same point on the right side of the shirt. The correct measurement in the example photos is 21.25".
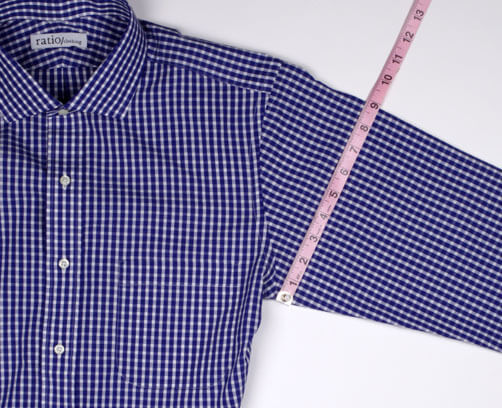
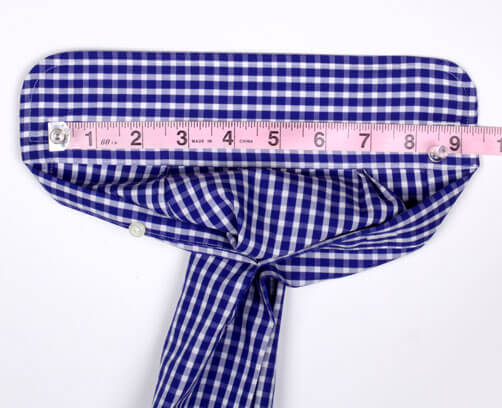
4. Bicep
With the shirt buttoned and laid flat on the back, spread the shirt sleeve out to the side and smooth out the fabric, so that the bottom seam of the sleeve is where the sleeve is folded. Starting at the bottom of the sleeve, one inch below where the sleeve attaches to the body of the shirt, measure to the top folded edge of the sleeve while keeping the measuring tape perpendicular to the top folded edge of the sleeve. Please note the example photo shows an outdated measurement location and the measuring tape should be shifted one inch below the armhole.
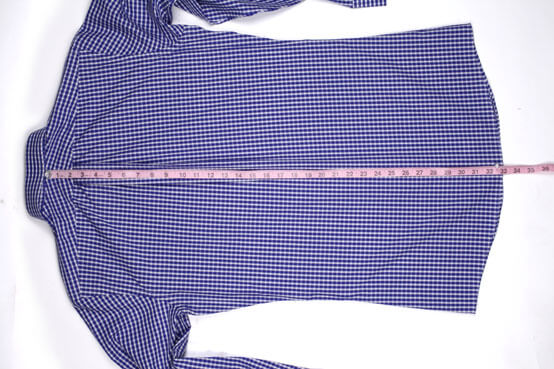
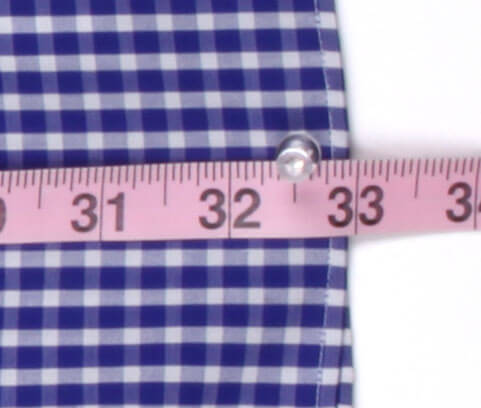
5. Shirt Length
Button up the shirt and lay it flat on the ground with the back of the shirt facing up. Place the measuring tape at the seam where the collar band attaches to the yoke (the fabric that sits across the shoulders) and measure straight down the middle of the back of the shirt to the hem at its longest point. The correct measurement in the example photos is 33".

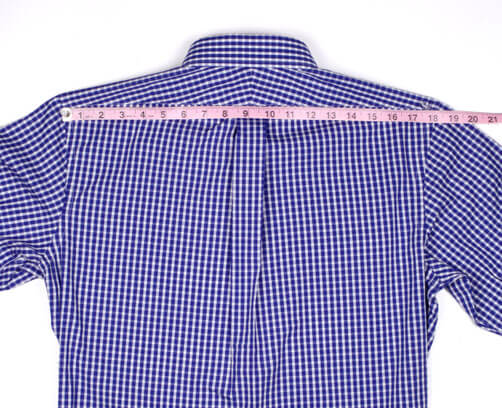
6. Shoulder Width
With the shirt laid flat, back facing up, place the tape at the point on the bottom seam of the yoke where the yoke attaches to the sleeve. Measure straight across to the same point on the other side of the shirt (start and finish on the outside edge of the sames). Like other measurements, smooth out the fabric and pull it tight without stretching it. The correct measurement in the example photos is 18.25".
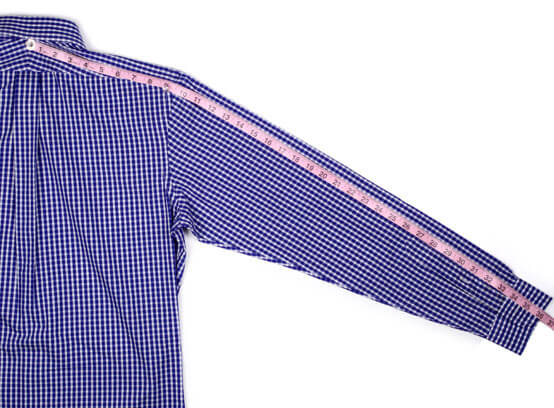
7. Sleeve Length
Lay the shirt flat with the back facing up. Extend the right sleeve out to the side and smooth it out as much as possible. Start the tape measure at the middle of the yoke, just below the collar band and measure out to the seam where the yoke attaches to the sleeve. Place a finger on the measuring tape at the seam where the yoke attaches to the sleeve to keep it in place, and then pull the tape measure taut to the end edge of the cuff on the sleeve. Record the measurement to the nearest 1/4". The correct measurement in the example photos is 36".

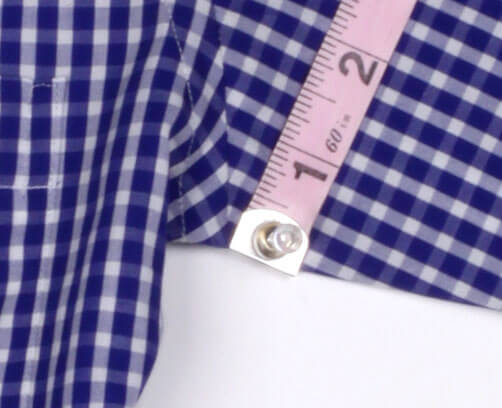
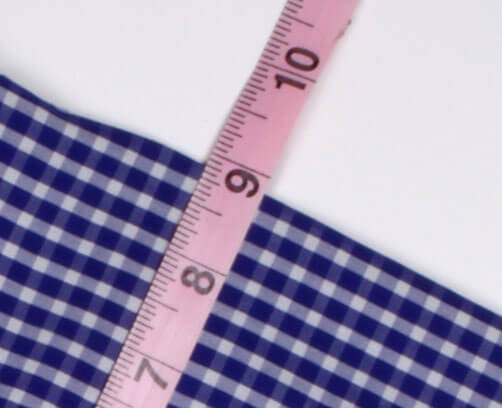
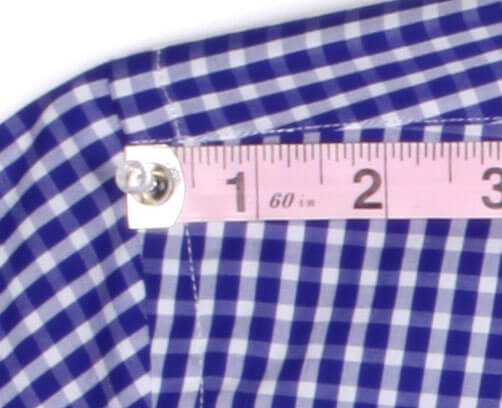
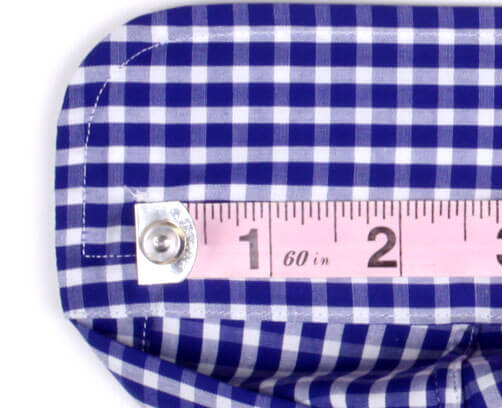
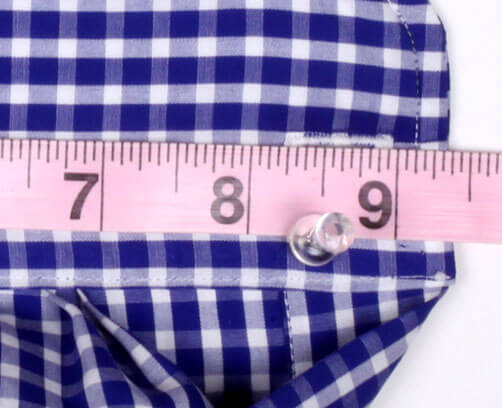
8. Cuff Circumference
Spread the cuff flat with the inside facing up. Measure from the center of the button (you’ll see the stitching) to the outside edge of the buttonhole. In general, you need to pull the cuff pretty tight here compared to the other measurements to get the right measurement since the cuff wants to curve on you naturally. Record the measurement to the nearest 1/4". The correct measurement in the example photos is 9".
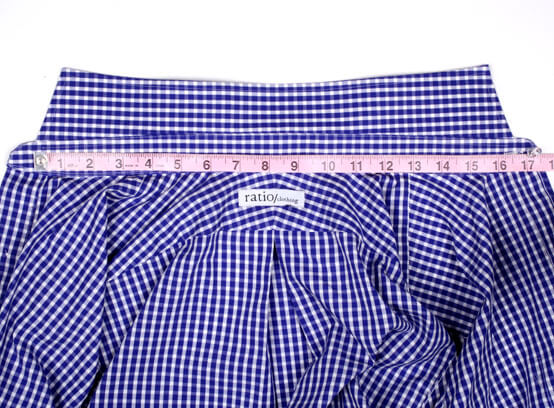
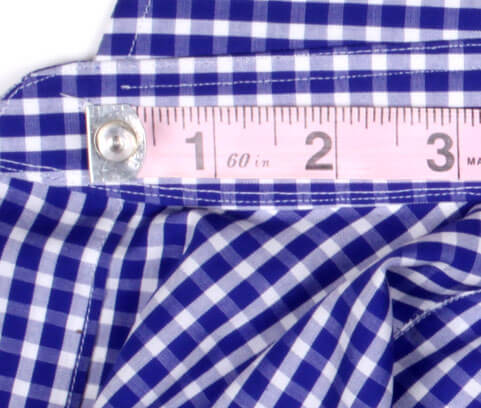
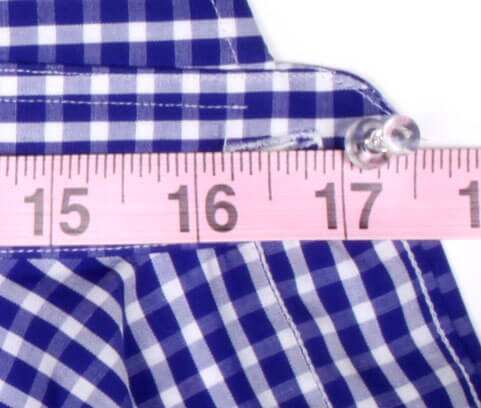
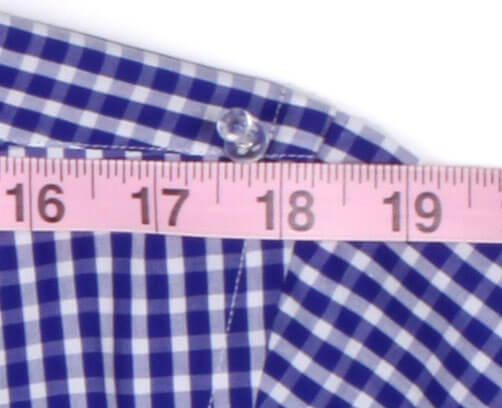
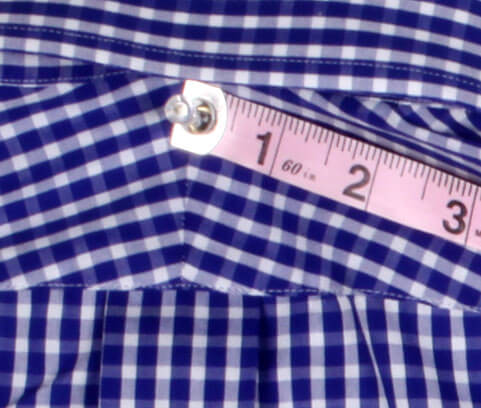
9. Collar Size
Open up the shirt and lay it flat with the back of the shirt on the ground. Open the collar and spread it as flat as possible, pulling tight so that you straighten out any curve. Measure from the center of the button (you should see the stitching) to the middle of the opposite buttonhole. Record the measurement to the nearest 1/4". The correct measurement in the example photos is 16.5".